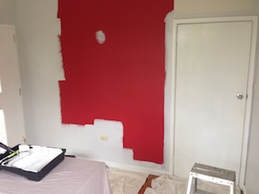
 Here's a system for choosing a wall colour that is radically different to the usual approach. It's especially useful when many rooms are to be painted and you don't want to stuff it up. And best of all you get a very accurate idea of how the colour will work. Read on ... FORGET SMALL SAMPLES When choosing a wall colour it’s standard practice to paint a patch ranging in size from an a4 page to a square metre. Most people have a shortlist of colours (and sometimes a long list) on the wall. And they look at the patches then choose. BIG MISTAKE! I’ve been doing it myself for years and guess what? It doesn’t work! Too many clients who were happy with the small test patch HATE the finished room. Because the effect of a finished painted room bears NO resemblance to a colour patch on a wall. Here’s why … 1. The new colour patch floats in a sea of your old wall colour. It is dominated by your existing wall colour. Colours are highly influenced by the surrounding colour. So a wee patch of cool grey on a wall painted yellowy cream will look uber-cold … by comparison. And the old colour doesn’t matter. It shouldn’t be there influencing the new one. Thanks old colour, its been great but, sorry. Its time to scram. 2. A fully painted room is like swimming in that new colour. It surrounds you, so the effect is completely different to looking at a little a4 sized patch on the wall. 3. A newly painted room with brilliant, sharp, clean, white trim and ceiling FRAMES the new colour differently to your old, faded, chipped, existing, trim and ceiling. 4. Sunlight. That’s right, light behaves differently on different walls. So the wee patch in full sunlight will look different in a dark corner. Whats to be done? PAINT ONE ROOM 1. Collect a selection of those the tiny postage stamp sized colour samples from Bunnings or another paint supplier and gradually winnow them down to no more than 3 that are probably going to be OK. 2. Get sample pots and put an a4 patch on the wall. Pardon? Didn’t you just say don’t do that? Yes I did. But this is just a disaster check. The tiny weeny postage stamp chips look much stronger and darker when painted a bit bigger. This process is aimed at eliminating any crazy ones now. 3. Ok so maybe you are now down to two colours. Choose one. I’m guessing they will be so close your friends wont be able to tell the difference. So choose one. 4. Get your friendly, local, painter (who you have met, received a fixed written quote from and who you have awarded the job) to paint ONE ROOM in the chosen wall colour with the chosen trim colour (usually semi gloss white). A 4 litre can will usually do one bedroom in two coats. THEN 5. This is how your chosen colour works in real life, on 4 walls, with sunlight. Stand in the room and decide … if it is the colour you expected …if it makes you feel the way you wanted it to make you feel … if you like it! NOW IS THE TIME TO DECIDE. Is this the colour you want through the whole house? 6. If you do like it, ask the painter to order what he needs and get cracking! If you do not like it, ask yourself why. Is it a grey that looks too blue? Is it an off white that looks too bland? Is it a colour that is far darker than you pictured? Find some little chips that are less blue/less bland/less dark and start the whole process again. The trim and ceiling have already been done so the painter only needs another 4 litre can of wall paint (and of course the extra labour – maybe an extra day?) And you don’t have 20 litres of the wrong paint sitting around. Give it a try. I think you’ll find this system works better. By Tony Richardson - The Tidy Painter - Mosman, Cremorne and the Lower North Shore's favourite painter. Comments are closed.
|
Was this info was helpful?Please leave a 5 star rating.
It's easy and fast!
Click the stars - no review needed.
|
 RSS Feed
