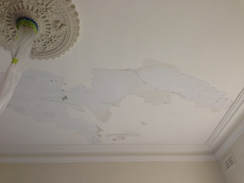
 How to fix cracks in walls and ceilings before they are painted. There are several TYPES of cracks. Each needs a slightly different approach to repair. I've listed the main types below and how to fix them. OLD HOMES Ceilings - plaster and lath - Wet plaster was originally squeezed over and between thin timber slats creating a smooth but strong surface. Over time age or movement cracks the plaster. Falling Chunks - If the damage is very bad and the plaster is unstable and falling off then a specialist trade plasterer will be needed. He will remove all unstable plaster and re apply new wet plaster. This is a complex, messy and expensive process but done properly will last another 100 years. Oh, and it will still need to be painted. Stable but cracked – Usually plaster and lath ceilings hold on pretty well but over time begin to crack into separate but stable sections. These cracks should be repaired as they look bad and gradually get worse. Wall Cracks – The internal walls of old Sydney homes are nearly always masonry (brick, concrete, stone, rubble!) covered in a cement render, which is in turn covered in wet plaster. Wall cracks occur when your home moves slightly on its foundations. Sometimes the soil under your home shrinks and expands with natural water and weather. Sometimes there is a problem that needs to be fixed such as a broken pipe. Cracks also often appear after renovations, jack hammering, and adjacent tile removal. NEW HOMES Ceiling and Wall cracks – The ceiling AND walls of modern homes are nearly all lined in drywall or Gyprock sheeting. This material is very smooth, cheap and fast to install. It is used in the cheapest and most expensive homes. Almost anyone can attach the sheets but ‘setting’ or plastering the joins is a specialised trade. The cracks that appear in drywall are usually above doors and anywhere where small sections are butt joined together. Foundation movement can also create cracks. For old and new homes and ceiling and wall repair, the crack repair process is the same. It takes a few days but is very effective. CRACK REPAIR 1. First any loose plaster in the crack should be scraped out. 2. Then all loose paint must be removed. Often a small peel or crack will give way to huge sheets of old paint that easily peel of. 3. Usually after the loose paint is removed a layer of fine dust remains. This must be vacuumed or washed off. 4. Once done I like to paint the damaged area with a sealer such as Peel Stop. This sealer binds any remaining dust, seeps under the sound paint edge, and also seeps into the crack to start the repair. 5. Next if the crack is wider than 1mm it should be filled with No More Gaps, which acts as a filler and additional adhesive. 6. Then a strip of Drywall Tape and plaster compound is applied. There are 3 kinds of tape – paper, fibreglass mesh and fibreglass mat (I prefer fibreglass mat). These tapes are designed to join and smooth modern Gyprock or Drywall sheets but make perfect ‘bandages’ for crack repair. The Tape + Compound patch must be left 24 hours to completely dry and cure. 7/8. The Tape will still be visible so 2 more coats of compound have to be applied, again waiting 12 hours between each coat. If the crack is part of a ‘crater’ left by removing old paint this crater should be skimmed and smoothed with compound at the same time. 9. Getting a perfect smooth finish can be quite hard. The best way is to gradually build up 3 thin layers waiting 12 hours each time. When the final layer is cured it can be smoothed by a. a quick scrape of flat edged tool, b. sanding, or c. wiping with a slightly dampened cloth. 10. The whole smooth repair is painted with another coat of Peel Bond. It is very important to seal the plaster. If regular paint is applied over raw plaster compound the paint will fail within a few months. 11/12/13. At least two coats of good quality paint should be applied over the repair. Sometimes a third coat is necessary because repair shows through. CORNICE REPAIR Cornice is the plaster moulding that covers and decorates where the wall joins the ceiling. With the movements discussed above, the join can often crack. Cornice cracks are nearly always between cornice and ceiling or between cornice and wall and are therefore concave or internal, rather than the flat surfaces of walls or ceilings. Concave repairs are best done with a product called No More Gaps. No More Gaps (or its equivalent made by other manufacturers) is squeezed out of a tube or caulking gun, a bit like toothpaste. It is then smoothed with a wet rag. It has the benefits of being fast drying, flexible, paintable and a pretty decent adhesive. BUT it shrinks! So its fine for concave repairs but on any smooth surface it sinks as it dries. So that’s how you repair a cracked ceiling or wall. Just remember that a small crack or paint peel may reveal a much larger crack under the loose paint. With the right materials, process and patience, an ugly crack can be banished for many years to come. |
Was this info was helpful?Please leave a 5 star rating.
It's easy and fast!
Click the stars - no review needed.
|

 RSS Feed
