Matching Paint Colours
How do I match paint colours?
How do I match wall colours?
How do I match my existing wall paint?
How do I match paint without knowing the colour?
Can I use my phone to colour match paint?
Matching existing paint colours is a painters nightmare! Most online advice makes it sound simple to match the right colour. But it’s … tricky.
I’ve been matching paint (and finding work-arounds) for many years so why not learn at my expense rather than your own?
I’ve been matching paint (and finding work-arounds) for many years so why not learn at my expense rather than your own?
How do I match wall colours?
Your Existing Paint Colour is not the colour you think it is.
The first problem is that the colour you carefully chose and have applied to your home is not the colour it once was (unless the paint job was less than a year ago).
Basically everything painted white starts to go slightly yellow - oil based white goes very yellow.
Coloured walls (ie. anything not cream) starts to fade. Any colour with red in it fades even faster.
And as if thats not enough, even the shiny-ness of the paint starts to flatten and go dull.
The result is that touching up a small repair or nail hole often gives a shiny, non-colour matching result.
Solution 1
Start with the colour and manufacturer name.
If you were smart, the last time you painted, you kept the paint name. eg. “Dulux Lexicon Quarter.” You need the manufacturers name because some names are shared across different paint companies.
This fresh paint may be a perfect match but probably not. Not enough for a blob in the middle of a wall anyway.
The answer is to paint ‘edge to edge’. That is, paint the entire wall from corner to corner, top to bottom (and above and below the picture rail if you have one). This way even if the new paint is ever so slightly different you shouldn’t notice. The light falling on different walls will let you get away with it.
Problems with this method of colour matching.
- Sometimes (over 10 years or so) paint manufacturers change the colour assigned to a name! Nuts I know, but there you are.
- Sometimes your existing paint colour has faded and even though it started as the same paint name and mixture it no longer matches.
- Sometimes your existing paint has dulled in finish and the new paint is shinier and looks different.
Solution 2
Take a sample and get it matched.
If you don’t know the name of the existing paint colour you can (try to) get a match.
Cut a piece out of the wall and take that bit of wall to a paint store so they can match with a clever scanner machine.
The best spot is above your wardrobe if it doesn’t go all the way to the ceiling, or behind a door. Anywhere out of sight. This spot will need to be spac-filled, sanded and painted later. You will need to cut about 3cm x 3cm for best results. For Gyprock walls I use a Stanley knife. For rendered/plaster/concrete walls I use a cold chisel.
A look around the internet will tell you this is a fool proof solution and a very close match is guaranteed. WRONG. This CAN work but often it DOESN’T.
Problems with this method.
- Sometimes the little camera thing can’t cope with lumps and bumps or dirt on your sample.
- There is a degree of human skill involved even with the clever scanner and all too often the operator does not have that skill.
- Sometimes it just doesn’t work.
Solution 3
Change the colour
Just pick a whole new colour name and paint the whole room. Why not use this as a way to modernise your room?
Solution 4
Get 'close enough'
If you’re patching up a rental (or your downstairs loo) and close enough is good enough, then fine, do that.
Change the colour
Just pick a whole new colour name and paint the whole room. Why not use this as a way to modernise your room?
Solution 4
Get 'close enough'
If you’re patching up a rental (or your downstairs loo) and close enough is good enough, then fine, do that.
Best Solution to matching wall colour paint ...
Repaint the whole room using the CLOSEST colour match you have. It doesn’t cost that much more, the room will look fresher, and you’ll probably save time overall!
How do I match ceiling paint colours?
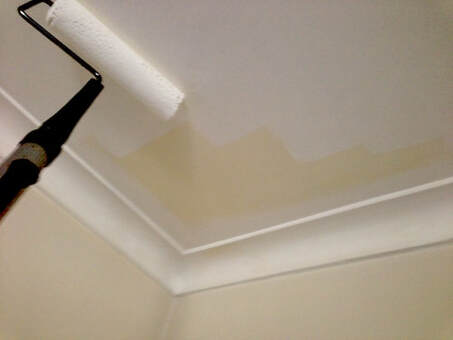
Most ceilings start life as ‘Vivid White’. That is plain bright white. But pretty quickly the ceiling yellows, even if you don’t notice. When you paint new Vivid White over a little patch the difference will be very noticeable.
At least with ceilings matching your current ceiling whites is fairly simple.
Solution1
If your current ceiling what was applied a year ago or less then a touch up with Vivid White should be fine. Any longer than that and you will see a difference.
Solution 2
Paint the whole ceiling.
You might get away with just doing the flat part and not the cornices. Give it a try and decide when it all dries.
Solution 3
Use Dulux Professional Ceiling Flat.
Dulux’s professional range is not available at Bunnings but can be bought at Inspirations or any Dulux trade centre. (Even though its called Professional anyone can buy it).
This paint has a bit more pigment which means it covers repairs better without as much show through.
But best of all, its ever so slightly cream coloured! Often this very slightly off white matches an aged Vivid White colour.
I’ve used it a few times for small patch ups and often it works. Thanks Dulux Professional!!!!
How do I match door, window, skirting board paint colours?
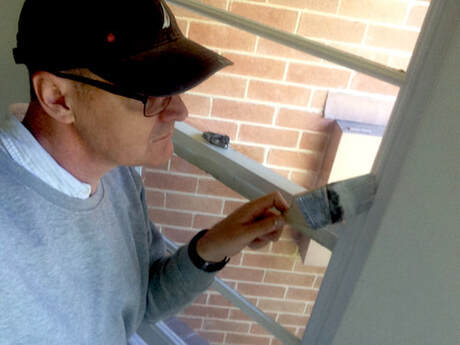
Wooden bits around your home (Doors, Windows, Skirting Boards, Picture Rails) are called collectively TRIM.
Matching trim is complicated by the fact that it may have been painted with water based Acrylic paint OR oil based Enamel.
Oil Based Enamel Trim
Trim painted with oil based paint yellows LIKE CRAZY! So much that a pure white will look like a solid cream in a few years.
AND it yellows unevenly. So one part of your trim will be a different ‘yellow-ness’ to another. (Bizarrely trim that is hidden from sunlight, like skirting behind furniture, yellows most).
So with oil based Trim you have a big uneven change to original white or colour!
For this reason, you will have to accept changes in colour OR paint ALL the trim in the room.
WARNING - If your new paint is Acrylic IT WILL NOT STICK TO OIL BASED WITHOUT A PRIMER. If you are unsure a layer of primer never hurts. I have had to patch up many Acrylic over Oil jobs. The proper solution is to scrape ALL the acrylic off, prime the old oil, then paint new Acrylic over new primer. But this is horrendously labour intensive. Usually I scrape and prime only the worst, most peeling areas.
https://www.mosman-handyman.com.au/blog/why-is-my-newly-painted-door-peeling
Water based Acrylic Trim
Acrylic doesn’t yellow as fast as oil based but it will still change colour over time. At least it will be a pretty even change.
Solution 1
Start with the colour and manufacturer name.
As with walls, an edge to edge approach works best. That is, paint the WHOLE door and frame, or the whole wall length of skirting board.
Solution 2
Take a sample and get it matched.
As with walls find an out of the way spot to remove your sample. You will need to wood chisel about 3cm x 3cm for best results. The area will need to be filled with bog, sanded and painted later.
Solution 3
Choose something close and paint the whole room.
Most trim colour is Vivid White or some kind of Cream. So as long as you paint the whole room you’ll be fine.
DON’T do this when matching paint colours.
Don’t use an online app
If the million dollar colour matching scanner in Bunnings or Inspirations can’t match 100% of the time, a free or near free app wont either.
Don’t take a photo
iPhone cameras use RGB (Red Blue Green) pixels just like a TV. Paint is mixed with dozens of different ‘tints’ A photo will give an ‘idea’ of the colour but not much more. I can almost guarantee this will lead to disappointment.
Don’t use paint sample cards
All paint sellers have those little cards that show each paint colour. Holding one against a wall is fine for CHOOSING a NEW colour, but terrible for guessing what the existing colour is.
Sorry to be such a wet blanket on this topic, but I’ve wasted countless cans of paint and clients time by trying most of the above methods.
At the end of the day my advice on matching colours is ...
‘Get as close as you can and paint the whole damn surface. Or better yet the whole damn room!’ .
Was this info helpful? If so, please leave a 5 star rating. Its easy and fast. No review needed.


