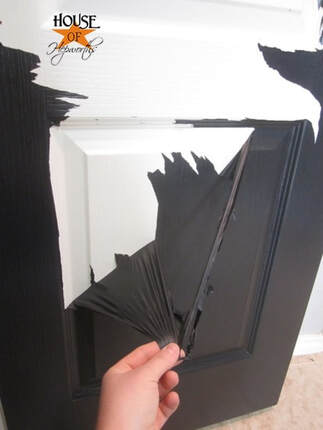
It always starts with the doors because they get the hardest treatment. But the windows will follow shortly then the skirting boards. This is a trap that many home renovators fall into because they just don’t know. So here’s the golden rule: |

CITY |
AVERAGE LABOUR COST* |
Sydney |
$74 to $105 |
Brisbane |
$84 to $88 |
Perth |
$82 to $8 |
Melbourne |
$79 to $87 |
Adelaide |
$65 to $75 |
*Price estimates are based on Rawlinsons’ Australian Construction Handbook 2018, Edition 36
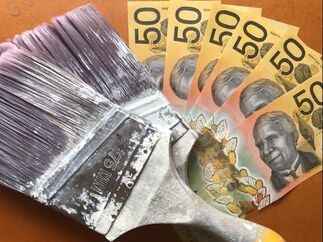
So I think it’s fair to say house painting in Sydney will cost somewhere between $60 and $105 per hour.
But do you really want to hire a painter by the hour? Only if you KNOW how long he will take and if you want to become the site foreman, making sure no one slacks off and costs you money.
For house painting, hourly is not the way to go.
DOES THE HOURLY RATE MATTER?
Not really. What matters is that you have a fixed figure for the JOB that you want done.
A BETTER WAY TO COMPARE PRICES ON A PAINTING JOB IN SYDNEY.
Ok, there are the 3 parts that do MATTER when getting and comparing quotes. It’s amazing how seldom clients get all three parts specified. Without ALL THREE you are flying blind and can’t make an accurate assessment of value.
And worse still without all three you can spend a fortune and not get what you wanted in the first place!
They are:
PART 1 - A full itemised list of what WORK is going to be done.
A quote to “paint a room” could mean almost anything ...
Occasionally I’m asked to explain why my quoted PRICE is different to another painters quoted PRICE. Almost certainly it’s because the WORK I plan to do is different to the WORK they plan to do. But without their fully itemised breakdown we’ll never know why.
PART 2 - A commitment to the NUMBER OF DAYS that your painting job will take.
A low price is pretty useless if the painting job is rushed through at lightening speed. I’ve seen five people painting a bathroom at the same time. Some were plastering, some were drying the plaster with hair dryers, some were painting. It was like a Marx Brothers movie! God knows how long that paint job lasted. But, hey, it was cheap!
PART 3 - The PRICE.
And of course you want to know the price. But you want to know the price IN COMBINATION with work done part and time taken part.
Notice that hourly wage doesn’t come into the equation at all.
What you want to know is:
WHAT WORK IS BEING DONE,
AND WHAT TIME IS BEING SPENT,
FOR THE MONEY BEING QUOTED?
Then and only then can you compare quotes and decide on the best value for YOUR SYDNEY HOME.
Was this info helpful? If so, please leave a 5 star rating. Its easy and fast. No review needed.
So I think it’s fair to say house painting in Sydney will cost somewhere between $60 and $105 per hour.
But do you really want to hire a painter by the hour? Only if you KNOW how long he will take and if you want to become the site foreman, making sure no one slacks off and costs you money.
For house painting, hourly is not the way to go.
DOES THE HOURLY RATE MATTER?
Not really. What matters is that you have a fixed figure for the JOB that you want done.
A BETTER WAY TO COMPARE PRICES ON A PAINTING JOB IN SYDNEY.
Ok, there are the 3 parts that do MATTER when getting and comparing quotes. It’s amazing how seldom clients get all three parts specified. Without ALL THREE you are flying blind and can’t make an accurate assessment of value.
And worse still without all three you can spend a fortune and not get what you wanted in the first place!
They are:
PART 1 - A full itemised list of what WORK is going to be done.
A quote to “paint a room” could mean almost anything ...
- Painting two coats, walls only. No prep.
- Painting one coat, walls only. No prep.
- Painting walls and ceilings only. No prep.
- Painting walls, ceiling, and trim only. No prep.
- All of the above with proper proper prep, scrubbing and priming first.
- All of the above with detailed crack repairs.
- All of the above with mould treatment
- All of the above with 3 to 4 coats as needed to give a perfect job.
- Or any combination of the above
- And what about masking, covering, removing door hardware, moving furniture?
Occasionally I’m asked to explain why my quoted PRICE is different to another painters quoted PRICE. Almost certainly it’s because the WORK I plan to do is different to the WORK they plan to do. But without their fully itemised breakdown we’ll never know why.
PART 2 - A commitment to the NUMBER OF DAYS that your painting job will take.
A low price is pretty useless if the painting job is rushed through at lightening speed. I’ve seen five people painting a bathroom at the same time. Some were plastering, some were drying the plaster with hair dryers, some were painting. It was like a Marx Brothers movie! God knows how long that paint job lasted. But, hey, it was cheap!
PART 3 - The PRICE.
And of course you want to know the price. But you want to know the price IN COMBINATION with work done part and time taken part.
Notice that hourly wage doesn’t come into the equation at all.
What you want to know is:
WHAT WORK IS BEING DONE,
AND WHAT TIME IS BEING SPENT,
FOR THE MONEY BEING QUOTED?
Then and only then can you compare quotes and decide on the best value for YOUR SYDNEY HOME.
Was this info helpful? If so, please leave a 5 star rating. Its easy and fast. No review needed.
 | Do you ever search “painter near me”? You’re not alone. But did you know WHY finding a good local painter near you was so important? There are 5 very good reasons listed below (and 1 word of warning!) |
1. Painters near me for local reviews, references, and referrals.
Reviews
ALWAYS check your prospective painter’s reviews. Google reviews are best because they are so hard to cheat. Facebook, Yelp and other reviews are OK too. This will tell you if a painter is any good.
But by going local you go one better. Better than just reviews, are REVIEWS FROM YOUR NEIGHBOURS! Your neighbours will have similar houses, work situations, and budgets to you. AND they will probably have found true local painters. You can’t get much closer to a practice run and it doesn’t cost you a penny!
References
Basically a reference is a phone number you can call to speak, in person, the old fashioned way. As mentioned above, the reference will be living in a home similar to yours with similar problems, issues, house type, parking, difficult neighbours etc. Have a chat!
Referrals
The brilliant painter your friend used in Brisbane isn’t much use to you. It’s the same if your friend had her house painted in Cronulla for the reasons listed above. But imagine a referral from a friend who lives in your area, with your type of house? Again similarity is very useful here.
2. Painters near me for knowledge of local construction style
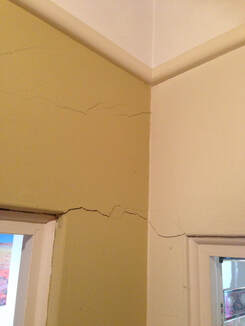
Your House construction has a good chance of being a mixture of old and new. You are probably not surprised to hear that the new bits of your house were built with different materials to the old bits. We painters call the material we paint onto, substrate.
Take Gyprock (or Drywall) as just one example. Invented in 1916 it was originally intended for poor people who couldn’t afford a ‘proper’ plaster interior wall or ceiling. But now it’s used in almost all new construction. I can almost guarantee the newer renovated part of your house has Gyprock ceilings and walls.
But if the older front part of your home was built before 1940 (that’s most of Mosman and the Lower North Shore) the interior walls will be wet plaster laid over brick work. The ceiling will be wet plaster squished through wooden slats called Lath.
So repairing and painting OLD wall and ceiling surfaces is COMPLETELY DIFFERENT to repairing and painting MODERN wall and ceiling surfaces.
And don’t even get me started on the differences between old and new windows, doors, skirting boards, picture rails, fire places … and on and on. These substrates are all different and react and move differently.
When you want your home painted a guy who has only ever painted new buildings, in the newer parts of Sydney, is not what you want.
You want a painter who has worked not only with NEW substrates but also with OLD. You want a local painter who has years of experience making either look great and last a long time.
3. Painters near me knowledge of the best local suppliers.
Bunnings is great for the average home handyman. And I admit I buy a lot of my off the shelf painting staples there. But … they are pretty unreliable when it comes to colour mixing. After 4 incorrect colours in 18 months I fired Bunnings from that job. Now I get all my mixed colours done at Inspirations in Cremorne. They are outstanding at mixing or matching colours. And because I work in the Mosman and lower North Shore area Inspirations are my local supplier. Who would I trust if I was painting in Ryde or Paramatta? I have no idea!
I also know that Ewens hardware (now Sunlight Mitre 10) on Military Rd Mosman are great for plaster, and small emergency bits and pieces.
The last thing you want is for your (non-local) painter to be wandering the country side in search of materials or paint that may not even be the right colour!
I also know that Ewens hardware (now Sunlight Mitre 10) on Military Rd Mosman are great for plaster, and small emergency bits and pieces.
The last thing you want is for your (non-local) painter to be wandering the country side in search of materials or paint that may not even be the right colour!
4. Painters near me for proximity to home base.
Although we try to have everything in our vehicles, ready to go, we painters occasionally have to return to our shed/garage/home base for a particular tool or ingredient.
So the closer that home base is to YOUR home the quicker we can get the thing and get back to work.
Or if Home Base is 50 km away most painters will figure out a less effective way that doesn’t use the special tool. It’s a small but important advantage to using local painters.
So the closer that home base is to YOUR home the quicker we can get the thing and get back to work.
Or if Home Base is 50 km away most painters will figure out a less effective way that doesn’t use the special tool. It’s a small but important advantage to using local painters.
5. Painters near me for local traffic vs Sydney traffic!
I’m told Sydney traffic is not the worst in the world, but it can be pretty bad. Especially if weird things like rain happen (I’m being sarcastic).
Sydney is a massive city and I don’t understand how one painter can cover all of it and have any time left to work. And sometimes even a small traffic problem/flood/new construction can prevent your painter from getting through.
The advantage with a local painter is that they have less chance of being delayed and YOU can be sure that they turn up at the same time EVERY day.
6. Painters near me … who really aren’t near you. Bonus tip.
I’ve noticed when you search ‘painters near me’ on Google you’ll get a whole bunch of large painting networks who will happily service Mosman and The Lower North Shore suburbs, but are in no way local painters.
(I just did a Google search and for “painters near Mosman”. Out of 19 results on the first page only 2 could be called anything like local painters (The Tidy Painter was one of those two!).
The rest are either large businesses (who will go anywhere from Wollongong to Newcastle) or large directories who let all comers list the suburbs they’d like to be listed for.
For all the reasons above just be careful you are actually talking to a true local painter!
Looking for a trusted local painter near Mosman or the Lower North Shore?

| | Hi, I'm Tony Richardson AKA The Tidy Painter. I'm an expert at fixing cracks and peeling paint on interior walls and ceilings because thats all I do. Usually these cracks etc. occur in older homes. If you live on Sydney's Lower North Shore and I sound like the sort of person you need, we should talk. (Actually, even if you're not in my service area, there's probably heaps of useful info. Have a look. It's free!) Have a look around my website for all the info you'll need - colour suggestions, prices, previous work, even a video! CLICK HERE FOR MORE INFO |
Was this info was helpful?Please leave a 5 star rating.

It's easy and fast!
Click the stars - no review needed.
Click the stars - no review needed.
 RSS Feed
